


You will need:
- 2 x fabrics
- Card
- Pencil
- Ruler
- Scissors/Rotary Cutter
- Pins
- Iron
- Sewing Machine
- ¾ kg of rice or lentils
- Funnel
- Jug/Container

Step One
Firstly, cut out all the template pieces using your ruler, pencil and rotary cutter. You will need a 15cm x 15cm piece for the top and bottom, a 15cm x 20cm piece for the sides and a 16.5cm x 8cm piece which will be for the handle.

Step Two
Now cut out the fabric pieces using your templates. Cut 2 x 15cm x 15cm pieces for the top and bottom, 4 x 15cm x 20cm pieces for the sides and 1 x 16.5cm x 8cm piece for the handle.

Step Three
Next, pin together all the side pieces right sides together. Be mindful that the pattern is facing the correct way up throughout.

Step Four
Stitch all the edges together on the sewing machine.

Step Five
Now construct the handle by taking your piece of fabric and along the two long edges fold over twice. Press with the iron, secure with pins and sew together on the sewing machine.

Step Six
Attach the handle to the top piece of fabric by lining up both edges and making sure it is positioned in the middle of the square, now pin on both edges; this will create a natural curve for the handle.

Step Seven
Now sew together on the machine, back stitch a couple of times to make sure the handle will be strong enough.

Step Eight
Next, attach the top piece to the rest of the doorstop by pinning all right sides together and sew on the sewing machine.

Step Nine
Repeat the last step for the bottom piece, making sure to leave an inch gap opening for adding the filing.

Step Ten
Pull the doorstop through the opening to turn the right way around and fill with your chosen weight using a funnel - we have used rice.

Step Eleven
Using a slip stitch, hand sew the opening closed.

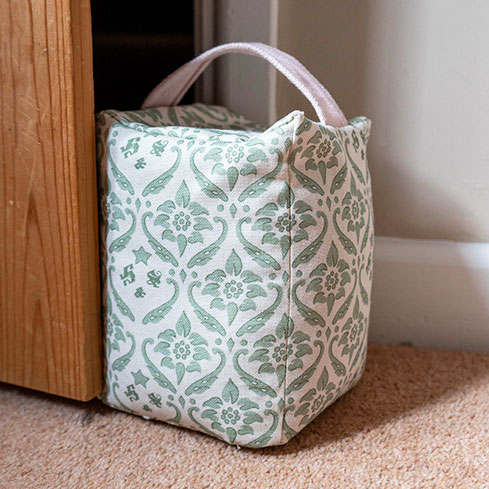
Finish
You now have your complete doorstop and it's ready to be placed anywhere around your home!