


What You Will Need
- Fabric
- Scissors
- Pinking Shears
- Ruler
- Poppers
- Thread
- Pen
- Chalk
- Sewing Machine
- Pegs

Step One
Firstly, cut out the front pieces from your chosen fabric, you need 2 x 7in by 12in pieces.

Step Two
Now you have the front pieces, using the contrasting fabric, cut out the 2 x pieces for the sides, these need to be 4.5in x 12in.

Step Three
You will also need a bottom piece; you can choose whether you do this in the same fabric as the sides or the same as the front. We have chosen to use the same fabric as the side, this needs to measure 4.5 in x 7 in.

Step Four
Next, trim the top of the bag pieces with a pair of pinking shears to give a nice top edge to the fabric when the bag is open.

Step Five
Next, attach the poppers to the top of the bag, separate each popper. Attach two poppers to the front piece, 1 3/4in from the sides and 3.5in down from the top. Once you have measured this out, make a small pen mark to help you know where to sew these on.

Step Six
Now you have measured out where they are going, using a needle and thread stitch the poppers on. It can be quite thick so you may want to use a thimble to help you.

Step Seven
For the back panel you will need to add poppers at the same width as the front piece which is 1¾in from side and ¾ of an inch down from the top.

Step Eight
Next, attach the bottom piece to the front fabric, do this by putting the right sides together, use pegs to attach the fabric together as pins will make holes in the fabric.

Step Nine
Next, sew along this line on the sewing machine, starting at 1/4in from the end and using ¼ of and inch seam allowance and leaving a ¼ of an inch at the end also. Increase the stitch length on the machine so to reduce the perforation on the fabric.

Step Ten
Now, attach the side pieces to the bottom, place them right sides together, making sure the edges you have cut with the pinking shears are at the top, on both sides and stitch.

Step Eleven
Now we have all the pieces attached to the bottom, take each corner and peg them all together, again right sides together and stitch on the sewing machine.

Step Twelve
When all the sides are stitched together, cut away any loose threads and turn right side around, be careful of the seams when doing this.
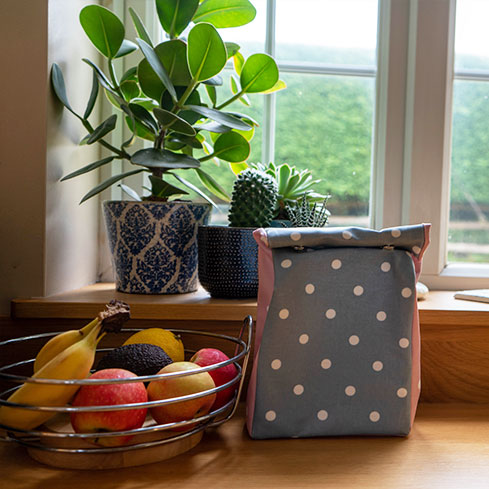
Now you have your reusable finished lunch bag!